[iOS]Core Bluetooth 활용하기#02 - 블루투스 기기 검색하기
블로그 이전 : https://staktree.tistory.com/
Core Bluetooth를 활용해 BLE기기를 검색해봅시다.
소개
안녕하세요. 지난 포스팅에서 블루투스와 BLE, 그리고 iOS의 프레임 워크인 Core Bluetooth에 대해 알아보았는데요! 이번 시간에는 Core Bluetooth를 활용하여 블루투스 기기를 검색하는 방법에 대해서 알아보겠습니다. 지난 포스팅의 내용은 [IOS]CoreBluetooth#01 - BLE와 CoreBluetooth란 무엇일까요?에서 확인할 수 있습니다!
Missions⭐️
- 블루투스 시리얼 만들기
- 주변 기기 검색하기, 연결하기
- BluetoothSerialDelegate 만들기
- 검색된 기기를 UITableView로 확인하기
먼저 오늘의 Mission들을 정리해보았는데요. 블루투스 시리얼을 구현하여 BLE를 사용하는 주변기기를 검색 및 연결을 수행할 예정입니다. 또, BluetoothSerialDelegat를 통해서 Bluetooth 시리얼을 다른 ViewController에서 쉽게 사용할 수 있도록 만들거에요. 마지막으로 블루투스 시리얼에서 검색된 주변기기들을 UITableView로 표현하고, 연결할 기기를 선택하면 블루투스 시리얼을 통해 기기 연결을 시도하도록 할 예정입니다.
Bluetooth 시리얼이란?
미션을 시작하기 전에 시리얼이 어떤 것인지 알고 넘어가는 것이 필요할 거 같아요. 시리얼은 보통 1 비트씩 순차적으로 데이터를 송수신하는 통신 프로토콜을 의미합니다. 이 포스팅에서는 Core Bluetooth 프레임워크를 이용하여 블루투스 통신을 전담하는 객체를 만들어 블루투스 시리얼로 활용할 예정입니다. 즉, 블루투스를 전담하는 클래스를 구현하고, 이 클래스로 선언된 객체를 시리얼로 활용하여 블루투스 통신을 진행합니다.
프로젝트 시작 전에
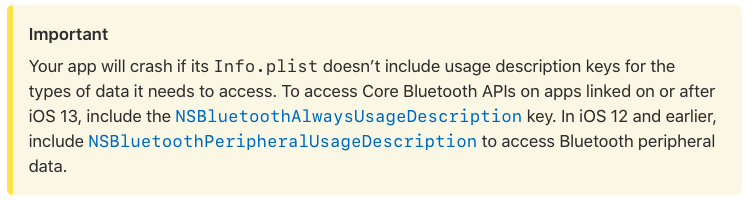
애플 공식문서에서 확인할 수 있는 내용인데요. CoreBluetooth를 사용하기 위해서는 iOS버전에 따라 Info.plist 파일에 특정 key를 추가해야합니다. iOS 13 이상에서는 NSBluetoothAlwaysUsageDescription를, iOS 12 이하 버전에서는 NSBluetoothPeripheralUsageDescription를 추가하라고 되어있네요. 이를 따르지 않으면 app에서 충돌이 일어나기 때문에 필수적으로 추가해야 합니다.
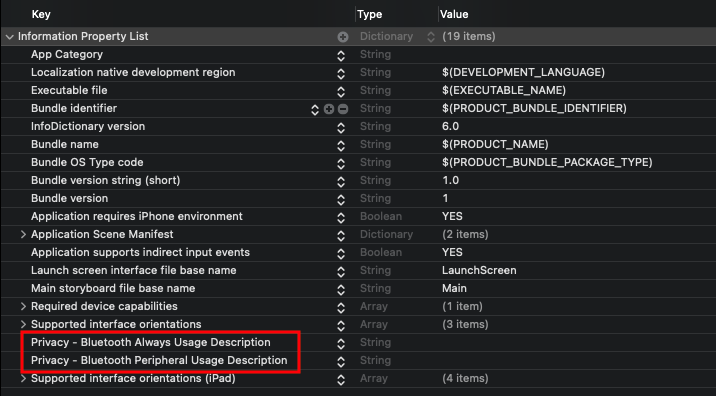
Info.plist에 버전에 맞는 key를 추가하셨나요? 자! 그럼 이제 본격적으로 미션을 시작봐요~
미션1. 블루투스 시리얼 만들기
그럼 이제 본격적으로 프로젝트를 시작해보겠습니다. 먼저 시리얼의 기본 구조를 알아볼게요!
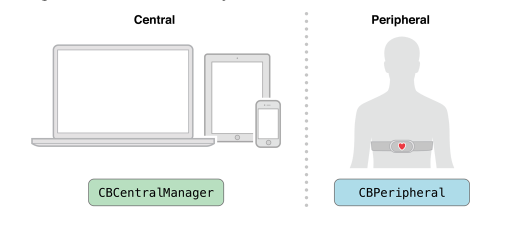
우선, 이번 포스팅에서는 블루투스 검색 및 연결에 대한 기능까지 구현할 예정인데요. 시리얼은 CBCentralManager과 CBPeripheral을 이용하여 블루투스 검색, 연결, 데이터 통신을 수행합니다. CBCentralManager은 주변기기를 제어하는 중앙 디바이스(iOS 디바이스)로써 블루투스 기기를 검색하고, 연결하는 역할을 맡습니다. CBPeriperal은 블루투스로 연결할 주변 기기를 뜻하며. CBCentralManager에서 검색된 기기에 대해 연결을 요청한다면 CBPeriperal 객체로 연결된 기기를 저장하게 됩니다. 이 과정에서 CBCentralManagerDelegate와 CBPeripheralDelegate에서 정의된 메서드들이 호출되며 블루투스 검색 및 연결을 지원합니다.
시리얼에서 구현할 것들이 정해졌으니 직접 만들어봐야겠네요. 먼저 BluetoothSerial.swift라는 새로운 파일을 추가해주세요.
BluetoothSerial.swift
import UIKit
import CoreBluetooth

/// 블루투스 통신을 담당할 시리얼을 클래스로 선언합니다. CoreBluetooth를 사용하기 위한 프로토콜을 추가해야합니다.
class BluetoothSerial: NSObject, CBCentralManagerDelegate, CBPeripheralDelegate {

    /// centralManager은 블루투스 주변기기를 검색하고 연결하는 역할을 수행합니다.
    var centralManager : CBCentralManager!

    /// pendingPeripheral은 현재 연결을 시도하고 있는 블루투스 주변기기를 의미합니다.
    var pendingPeripheral : CBPeripheral?

    /// connectedPeripheral은 연결에 성공된 기기를 의미합니다. 기기와 통신을 시작하게되면 이 객체를 이용하게됩니다.
    var connectedPeripheral : CBPeripheral?

   /// 데이터를 주변기기에 보내기 위한 characteristic을 저장하는 변수입니다.
    weak var writeCharacteristic: CBCharacteristic?

    /// 데이터를 주변기기에 보내는 type을 설정합니다. withResponse는 데이터를 보내면 이에 대한 답장이 오는 경우입니다. withoutResponse는 반대로 데이터를 보내도 답장이 오지 않는 경우입니다.
    private var writeType: CBCharacteristicWriteType = .withoutResponse

    /// serviceUUID는 Peripheral이 가지고 있는 서비스의 UUID를 뜻합니다. 거의 모든 HM-10모듈이 기본적으로 갖고있는 FFE0으로 설정하였습니다. 하나의 기기는 여러개의 serviceUUID를 가질 수도 있습니다.
    var serviceUUID = CBUUID(string: "FFE0")

  	/// characteristicUUID는 serviceUUID에 포함되어있습니다. 이를 이용하여 데이터를 송수신합니다. FFE0 서비스가 갖고있는 FFE1로 설정하였습니다. 하나의 service는 여러개의 characteristicUUID를 가질 수 있습니다.
    var characteristicUUID = CBUUID(string : "FFE1")


  // CBCentralManagerDelegate에 포함되어 있는 메서드입니다. central 기기의 블루투스가 켜져있는지, 꺼져있는지 등에 대한 상태가 변화할 때 마다 호출됩니다. 이 상태는 블루투스가 켜져있을 때는 .poweredOn, 꺼져있을 때는 .poweredOff로 관리됩니다.
  	func centralManagerDidUpdateState(_ central: CBCentralManager) {
        pendingPeripheral = nil
        connectedPeripheral = nil
    }
}
CoreBluetooth를 import하고, BluetoothSerial Class를 선언해주세요. 또, CoreBluetooth에 필요한 NSObject, CBCentralManagerDelegate, CBPeripheralDelegate 프로토콜을 추가해주세요. 그 다음으로 centralManagerDidUpdateState(_ central :) 추가합니다. 이는 CBCentralManagerDelegate에서 필수로 요구하는 메서드인데요. Central 기기의 블루투스 상태 변화할 때마다 호출되며, Central에서 BLE를 사용할 수 있는지 확인하기 위해 꼭 필요합니다. 이제 변수를 선언해 볼까요? centralManager와 connectedPeripheral를 선언하였는데요. 각각 CBCentralManager와 CBPeripheral 객체로, Central 기기를 관리하는 역할과 연결된 Peripheral(주변 기기)를 관리하는 역할을 수행합니다. 추가적으로 현재 연결을 시도하고 있는 주변 기기를 관리하기 위해 pendingPeripheral을 선언하였습니다. 또, 데이터 통신을 하기 위해서 연결된 기기의 characteristic와 기기의 응답 여부를 알고 있어야하는데 이를 저장하기 위해 writeCharacteristic과 writeType를 선언하였습니다.
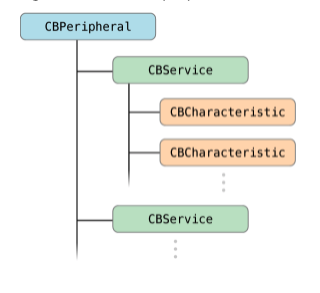
다음으로 Peripheral의 Service와 Characteristic을 찾기 위한 UUID를 설정해야합니다. 하나의 Peripheral은 여러 개의 Service를 가질 수 있으며, 하나의 Service는 여러 개의 Characteristic을 갖고 있을 수 있습니다. CoreBluetooth는 이 구조를 CBPeripheral, CBService, CBCharacteristic로 표현합니다. CoreBluetooth에서 기기를 검색할 때, 주변의 모든 Service와 Characteristic에 대한 Peripheral을 검색할 수도 있지만 이는 많은 배터리를 소모시킵니다. 따라서 특정 Service와 Characteristic을 검색하는 것이 필요한데요. 이를 위해 serviceUUID와 characteristicUUID를 설정하여 해당 UUID를 가진 블루투스 기기만을 검색하도록 합니다. 저는 serviceUUID는 ‘FFE0’로, characteristicUUID는 ‘FFE1’로 설정하였는데요. 이 UUID는 HM-10 모듈에서 기본적으로 포함하고 있는 Service와 Characteristic입니다. 원래 온도와 관련된 UUID라고 하는데 문자열 송수신이 가능하여 그대로 사용하시면 될 듯합니다.
기본적인 틀은 완성된 거 같군요! 이제 기능을 구현해봅시다.
미션 2. 블루투스 기기 검색하기, 연결하기
이제 블루투스 기기를 검색하기 위한 코드를 작성할 차례입니다. 아까 작성했던 BluetoothSerial.swift에 이어서 작성해볼게요!
BluetoothSerial.swift
    /// 기기 검색을 시작합니다. 연결이 가능한 모든 주변기기를 serviceUUID를 통해 찾아냅니다.
    func startScan() {
        guard centralManager.state == .poweredOn else { return }

      // CBCentralManager의 메서드인 scanForPeripherals를 호출하여 연결가능한 기기들을 검색합니다. 이 떄 withService 파라미터에 nil을 입력하면 모든 종류의 기기가 검색되고, 지금과 같이
      // serviceUUID를 입력하면 특정 serviceUUID를 가진 기기만을 검색합니다.
    	centralManager.scanForPeripherals(withServices: [serviceUUID], options: nil)

    	let peripherals = centralManager.retrieveConnectedPeripherals(withServices: [serviceUUID])
    	for peripheral in peripherals {
         // TODO : 검색된 기기들에 대한 처리를 여기에 작성합니다.(잠시 후 작성할 예정입니다)

    	}
		}

    /// 기기 검색을 중단합니다.
    func stopScan() {
        centralManager.stopScan()
    }

	  /// 파라미터로 넘어온 주변 기기를 CentralManager에 연결하도록 시도합니다.
    func connectToPeripheral(_ peripheral : CBPeripheral)
    {
        // 연결 실패를 대비하여 현재 연결 중인 주변 기기를 저장합니다.
        pendingPeripheral = peripheral
        centralManager.connect(peripheral, options: nil)
    }

    // CBCentralManagerDelegate에 포함되어 있는 메서드입니다.
    // central 기기의 블루투스가 켜져있는지, 꺼져있는지 확인합니다. 확인하여 centralManager.state의 값을 .powerOn 또는 .powerOff로 변경합니다.
    func centralManagerDidUpdateState(_ central: CBCentralManager) {
        pendingPeripheral = nil
        connectedPeripheral = nil
    }

    // 기기가 검색될 때마다 호출되는 메서드입니다.
    func centralManager(_ central: CBCentralManager, didDiscover peripheral: CBPeripheral, advertisementData: [String : Any], rssi RSSI: NSNumber) {
        // RSSI는 기기의 신호 강도를 의미합니다.
        // TODO : 기기가 검색될 때마다 필요한 코드를 여기에 작성합니다.(잠시 후 작성할 예정입니다)
    }


    // 기기 연결가 연결되면 호출되는 메서드입니다.
    func centralManager(_ central: CBCentralManager, didConnect peripheral: CBPeripheral) {
        peripheral.delegate = self
        pendingPeripheral = nil
        connectedPeripheral = peripheral

        // peripheral의 Service들을 검색합니다.파라미터를 nil으로 설정하면 peripheral의 모든 service를 검색합니다.
        peripheral.discoverServices([serviceUUID])
    }


    // service 검색에 성공 시 호출되는 메서드입니다.
    func peripheral(_ peripheral: CBPeripheral, didDiscoverServices error: Error?) {
        for service in peripheral.services! {
            // 검색된 모든 service에 대해서 characteristic을 검색합니다. 파라미터를 nil로 설정하면 해당 service의 모든 characteristic을 검색합니다.
            peripheral.discoverCharacteristics([characteristicUUID], for: service)
        }
    }


    // characteristic 검색에 성공 시 호출되는 메서드입니다.
    func peripheral(_ peripheral: CBPeripheral, didDiscoverCharacteristicsFor service: CBService, error: Error?) {
        for characteristic in service.characteristics! {
            // 검색된 모든 characteristic에 대해 characteristicUUID를 한번 더 체크하고, 일치한다면 peripheral을 구독하고 통신을 위한 설정을 완료합니다.
            if characteristic.uuid == characteristicUUID {
                // 해당 기기의 데이터를 구독합니다.
                peripheral.setNotifyValue(true, for: characteristic)
                // 데이터를 보내기 위한 characteristic을 저장합니다.
                writeCharacteristic = characteristic
                // 데이터를 보내는 타입을 설정합니다. 이는 주변기기가 어떤 type으로 설정되어 있는지에 따라 변경됩니다.
                writeType = characteristic.properties.contains(.write) ? .withResponse :  .withoutResponse
                // TODO : 주변 기기와 연결 완료 시 동작하는 코드를 여기에 작성합니다.(잠시 후 작성할 예정입니다)
            }
        }
    }

    func peripheral(_ peripheral: CBPeripheral, didWriteValueFor characteristic: CBCharacteristic, error: Error?) {
        // writeType이 .withResponse일 때, 블루투스 기기로부터의 응답이 왔을 때 호출되는 함수입니다.
        // 제가 테스트한 주변 기기는 .withoutResponse이기 때문에 호출되지 않습니다.
        // writeType이 .withResponse인 블루투스 기기로부터 응답이 왔을 때 필요한 코드를 작성합니다.(필요하다면 작성해주세요.)

    }

    func peripheral(_ peripheral: CBPeripheral, didReadRSSI RSSI: NSNumber, error: Error?) {
        // 블루투스 기기의 신호 강도를 요청하는 peripheral.readRSSI()가 호출하는 함수입니다.
        // 신호 강도와 관련된 코드를 작성합니다.(필요하다면 작성해주세요.)
    }
startScan()은 기기 검색을 시작하는 부분입니다. centralManager.scanForPeripherals(withServices: , options: )을 호출하여 새로운 기기를 검색하는데, 이 메서드는 새로운 기기가 검색될 때마다 centralManager(_ central:, didDiscover peripheral:, advertisementData:, rssi RSSI:)를 호출합니다. centralManager(_ central:, didDiscover peripheral:, advertisementData:, rssi RSSI:)내에 TableView를 업데이트하는 코드를 작성하면, TableView에서 검색된 주변기기들을 확인할 수 있습니다. 그리고 이미 검색된 기기들은 centralManager.retrieveConnectedPeripherals(withServices: )로 다시 불러올 수 있는데, 검색을 한번 실행한 후 다시 실행했을 때를 대비하여 startScan()에서 이미 검색되어 있던 기기들이 있다면TableView로 표시하는 코드를 작성할 예정입니다.
stopScan()은 검색을 중지하는 기능을 수행합니다. centralManager.stopScan()를 사용하여 쉽게 구현되어 있네요.
connectToPeripheral(_ peripheral : CBPeripheral)은 특정 기기에 대한 연결을 수행합니다. CBCentralManager의 connect(_ peripheral :, option : )에 연결할 peripheral을 파라미터로 전달하여 연결합니다. 이 과정에서 centralManager(_ central: CBCentralManager, didConnect peripheral: CBPeripheral)가 호출되도록 설정되어 있는데요. 이 메서드 내에서 connectedPeripheral을 해당 Peripheral로 설정하는 코드를 작성하고, 다시 discoverServices()를 직접 호출하게 합니다. discoverServices()은 Peripheral이 포함하고 있는 service를 검색하게 됩니다. service가 검색되면 peripheral(_ peripheral: CBPeripheral, didDiscoverServices error: Error?)가 자동으로 호출되는데요. 여기서는 peripheral.discoverCharacteristics()을 직접 호출하여 service 내의 characteristic을 검색하게 합니다. characeristic이 검색되면 peripheral(_ peripheral: CBPeripheral, didDiscoverCharacteristicsFor service: CBService, error: Error?)이 자동으로 호출됩니다. 여기서는 해당 기기의 데이터를 구독하고, 데이터를 보내기 위한 characteristic을 저장해놓습니다. 또, 연결이 성공적으로 완료되었을 때에 대한 로직을 코드로 작성하면 됩니다.
다시 정리하면 맨 앞의 메서드들을 코드로 작성하면 화살표의 메서드들이 조건이 만족될 때마다 자동으로 호출됩니다. 이 자동으로 호출된 메서드에 다음 번호의 메서드를 직접 호출하도록 코드를 작성합니다.
-
CBCentralManager.connect(_ peripheral :, option : ) => centralManager(_ central: CBCentralManager, didConnect peripheral: CBPeripheral)
-
discoverServices() => peripheral(_ peripheral: CBPeripheral, didDiscoverServices error: Error?)
-
peripheral.discoverCharacteristics() => peripheral(_ peripheral: CBPeripheral, didDiscoverCharacteristicsFor service: CBService, error: Error?)
미션3. BluetoothSerialDelegate 만들기
BluetoothSerial은 여러 개의 ViewController에서 사용될 수 있습니다. 따라서 BluetoothSerial 객체를 글로벌 전역 변수로 선언하여 사용하면 다른 클래스에서의 사용이 편리합니다. BluetoothSerial.swift 파일 위 쪽에 serial이란 이름으로 선언해주세요. 이 객체를 사용하기 전에 꼭 BluetoothSerial 클래스의 init()을 이용하여 초기화하여야 합니다. Init()에서는 centralManager의 delegate를 self로 설정합니다.
BluetoothSerial.swift
import UIKit
import CoreBluetooth

/// 블루투스와 관련된 일을 전담하는 글로벌 시리얼 핸들러입니다.
var serial: BluetoothSerial!

class BluetoothSerial: NSObject, CBCentralManagerDelegate, CBPeripheralDelegate {
  // 내용 생략
  ...
  /// serial을 초기화할 떄 호출하여야합니다. 시리얼은 nil이여서는 안되기 때문에 항상 초기화후 사용해야 합니다.
    override init() {
        super.init()
        self.centralManager = CBCentralManager(delegate: self, queue: nil)
    }
}
BluetoothSerial가 여러 개의 클래스에서 사용되기 때문에 BluetoothSerial 역시 다른 클래스의 메서드를 호출하는 경우가 생깁니다. 예를 들어 검색한 블루투스 기기를 TableView로 표시하는 Scan 뷰 클래스가 있다면 기기가 검색될 때마다 테이블 뷰를 새로고침해야할 것입니다. 이 때 새로운 기기가 검색될 때마다 호출되는 메서드는 BluetoothSerial에 있기 때문에 BluetoothSerial 클래스에서 Scan 뷰 클래스의 테이블 뷰를 새로고침하는 메서드를 호출하게 됩니다. 이런 경우 클래스 간의 연관성을 protocol을 사용하여 정의하게되는데, BlutoothSerialDelegate라는 이름으로 선언하여 뷰의 함수를 delegate로 호출하도록 할 예정입니다.
BluetoothSerial.swift
// 블루투스를 연결하는 과정에서의 시리얼과 뷰의 소통을 위해 필요한 프로토콜입니다.
protocol BluetoothSerialDelegate : AnyObject {
    func serialDidDiscoverPeripheral(peripheral : CBPeripheral, RSSI : NSNumber?)
    func serialDidConnectPeripheral(peripheral : CBPeripheral)
}

// 프로토콜에 포함되어 있는 일부 함수를 옵셔널로 설정합니다.
extension BluetoothSerialDelegate {
    func serialDidDiscoverPeripheral(peripheral : CBPeripheral, RSSI : NSNumber?) {}
    func serialDidConnectPeripheral(peripheral : CBPeripheral) {}
}
BluetoothSerialDelegate를 선언해보았는데요. protocol로 선언된 함수의 역할을 설명드리자면, serialDidDiscoverPeripheral()은 Peripheral이 발견되었을 때 검색된 기기 리스트와 테이블 뷰를 업데이트하는 메서드입니다. 또, serialDidConnectPeripheral()은 Peripheral이 연결되었을 때 호출되는 메서드입니다. Serial에서 BluetoothSerialDelegate 객체로 해당 메서드를 호출하면 delegate로 설정된 BluetoothSerialDelegate 객체 내의 해당 메서드가 호출되게 됩니다. 자세한 내용은 포스팅을 진행하면서 다시 한번 더 설명드리도록 하겠습니다.
아래 extension class는 protocol의 메서드가 Optional로 존재할 수 있도록하는 역할을 수행합니다. 여기 선언된 메서드들은 이 프로토콜이 적용된 모든 클래스에서 꼭 정의될 필요가 없게 됩니다.
BluetoothSerial.swift
class BluetoothSerial: NSObject, CBCentralManagerDelegate, CBPeripheralDelegate {

    // BluetoothSerialDelegate 프로토콜에 등록된 메서드를 수행하는 delegate입니다.
    var delegate : BluetoothSerialDelegate?

  	// 생략
  	...
}
그럼 BluetoothSerial에 BluetoothSerialDelegate 객체를 선언해주세요. delegate는 위에서 설명한대로 현재 설정된 BluetoothSerialDelegate객체에 정의된 메서드를 대신 호출할 수 있게하는 대리자입니다. BluetoothSerialDelegate 프로토콜이 적용된 클래스가 여러 개가 있고, 이 클래스들은 protocol의 적용된 메서드를 정의합니다. 이 상황에서 delegate에 어떤 클래스가 적용되어 있는지에 따라 해당 클래스의 메서드를 호출합니다. 이제 다음 미션으로 넘어가겠습니다.
미션 4.검색된 기기를 UITableView로 확인하기
이제 마지막 미션이네요. 조금만 더 힘내시길 바랍니다! 이제 검색된 기기를 UITableView로 확인하고, 기기를 선택하여 연결하면 됩니다.
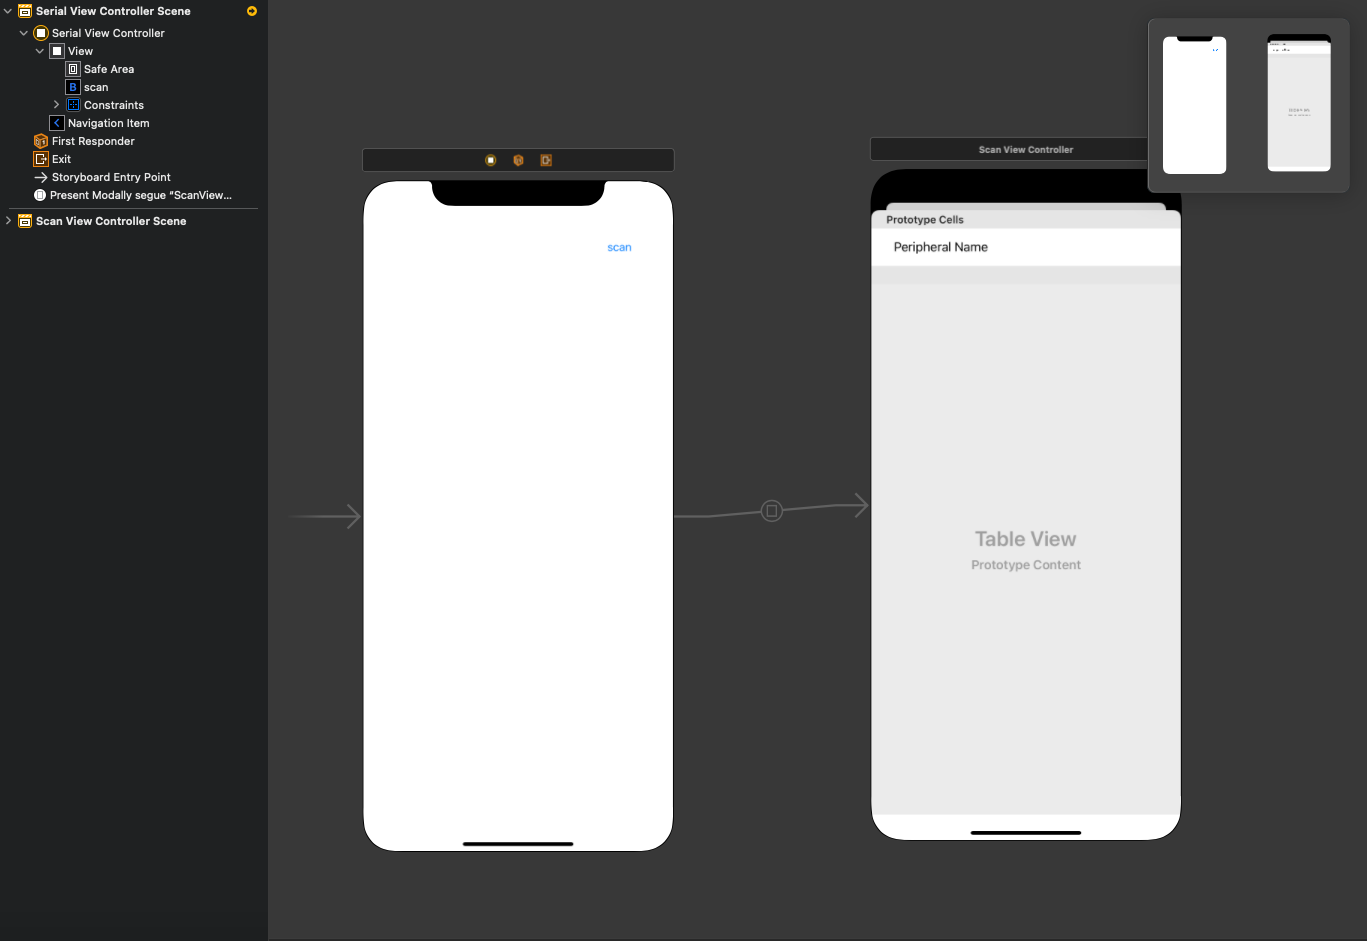
스토리 보드에 2개의 ViewController Scene를 만들어주었습니다. Serial View Controller의 scan 버튼을 클릭하면 Scan View Controller에 검색된 기기들이 UITableView로 나타는 구조입니다. Serial View Controller에는 scan 버튼을 추가해주시고, Scan View Controller에는 TableView를 추가해주세요. 그 다음 Serial View Controller와 Scan View Controller를 세그웨이로 연결해주세요. 그리고 Table View와 Scan View Controller의 delegate와 dataSource를 연결해주세요. 마지막으로 세그웨이를 수행할 때 Scan View Controller의 Identifier가 필요하기 때문에 Storyboard ID를 ScanViewController로 설정해주세요.
다음으로 Serial View Controller의 코드를 살펴보겠습니다.
SerialViewController.swift
import UIKit

class SerialViewController: UIViewController, BluetoothSerialDelegate {
    override func viewDidLoad() {
        super.viewDidLoad()
				// 해당 뷰가 가장 먼저 로드되기 때문에 여기서 serial을 초기화합니다.
        // BluetoothSerial.swift 파일에 있는 Bluetooth Serial인 serial을 초기화합니다.
        serial = BluetoothSerial.init()
    }

    // scan 버튼이 클릭되면 호출되는 메서드입니다.
    @IBAction func scanButton(_ sender: Any) {
        // 세그웨이를 호출하여 Scan 뷰를 로드합니다.
        performSegue(withIdentifier: "ScanViewController", sender: nil)
    }
}
scanButton을 아까 만들어두었던 Serial View Controller 뷰의 버튼과 연결하면 클릭 시 Scan View Controller로 연결되게 됩니다. 이제 Scan View Controller의 코드를 작성하겠습니다.
SerialViewController.swift
import UIKit
import CoreBluetooth

class ScanViewController: UIViewController, UITableViewDataSource, UITableViewDelegate, BluetoothSerialDelegate {

    // 검색된 기기들을 나타내는 TableView입니다.
    @IBOutlet weak var tableView: UITableView!

    // 현재 검색된 peripheralList입니다.
    var peripheralList : [(peripheral : CBPeripheral, RSSI : Float)] = []

    override func viewDidLoad() {
        super.viewDidLoad()
        // scan 버튼을 눌러 기기 검색을 시작할 때마다 list를 초기화합니다.
        peripheralList = []
        // serial의 delegate를 ScanViewController로 설정합니다. serial에서 delegate의 메서드를 호출하면 이 클래스에서 정의된 메서드가 호출됩니다.
        serial.delegate = self
        // 뷰가 로드된 후 검색을 시작합니다.
        serial.startScan()
    }

    //MARK: 테이블 뷰 데이터 소스
    func tableView(_ tableView: UITableView, numberOfRowsInSection section: Int) -> Int {
        // 몇 개의 셀을 보여줄 지 결정합니다. peripheralList의 개수만큼 셀을 보여줍니다.
        return peripheralList.count
    }


    func tableView(_ tableView: UITableView, cellForRowAt indexPath: IndexPath) -> UITableViewCell {
        // 셀을 어떻게 표현할지 결정합니다.
        guard let cell = tableView.dequeueReusableCell(withIdentifier: "ScanTableViewCell", for: indexPath) as? ScanTableViewCell else {
            return UITableViewCell()
        }
        // peripheral의 이름을 cell에 나타나도록 합니다.
        let peripheralName = peripheralList[indexPath.row].peripheral.name
        cell.updatePeriphralsName(name: peripheralName)

        return cell
    }

    //MARK: 테이블 뷰 델리게이트
    func tableView(_ tableView: UITableView, didSelectRowAt indexPath: IndexPath) {
        // 셀을 클릭했을 때의 처리를 담당합니다.

        // 테이블 뷰의 셀을 선택했을 때 UI에 나타나는 효과입니다.
        tableView.deselectRow(at: indexPath, animated: true)

        // 선택된 Pheripheral을 연결합니다. 검색을 중단하고, peripheralList에 저장된 peripheral 중 클릭된 것을 찾아 연결합니다.
        serial.stopScan()
        let selectedPeripheral = peripheralList[indexPath.row].peripheral
        // serial의 connectToPeripheral 함수에 선택된 peripheral을 연결하도록 요청합니다.
        serial.connectToPeripheral(selectedPeripheral)
    }

    //MARK: 시리얼에서 호출되는 딜리게이트 함수들
    func serialDidDiscoverPeripheral(peripheral : CBPeripheral, RSSI : NSNumber?)
    {
        // serial의 delegate에서 호출됩니다.
        // 이미 저장되어 있는 기기라면 return합니다.
        for existing in peripheralList {
            if existing.peripheral.identifier == peripheral.identifier {return}
        }
        // 신호의 세기에 따라 정렬하도록 합니다.
        let fRSSI = RSSI?.floatValue ?? 0.0
        peripheralList.append((peripheral : peripheral , RSSI : fRSSI))
        peripheralList.sort { $0.RSSI < $1.RSSI}
        // tableView를 다시 호출하여 검색된 기기가 반영되도록 합니다.
        tableView.reloadData()
    }

    func serialDidConnectPeripheral(peripheral : CBPeripheral)
    {
        // serial의 delegate에서 호출됩니다.
        // 연결 성공 시 alert를 띄우고, alert 확인 시 View를 dismiss합니다.
        let connectSuccessAlert = UIAlertController(title: "블루투스 연결 성공", message: "\(peripheral.name ?? "알수없는기기")와 성공적으로 연결되었습니다.", preferredStyle: .actionSheet)
        let confirm = UIAlertAction(title: "확인", style: .default, handler: { _ in self.dismiss(animated: true, completion: nil) } )
        connectSuccessAlert.addAction(confirm)
        serial.delegate = nil
        present(connectSuccessAlert, animated: true, completion: nil)
    }
}
view가 로드되면 peripheralList를 초기화하고 serial의 delegate를 ScanViewController로 설정한 후 startScan()을 호출하여 주변 기기 검색을 시작합니다. 검색이 될 때마다 serial에서 serialDidDiscoverPeripheral()을 호출하여 tableView를 update할 예정입니다. 검색된 기기는 peripheralList로 저장되어 관리됩니다. peripheralList을 활용하여 TableView의 셀의 개수와 셀의 내용을 설정합니다. 또, 셀이 클릭되었을 때 peripheralList의 index값의 Peripheral에 대한 연결을 요청합니다. 연결이 완료되면 serialDidConnectPeripheral()이 호출되어 alert를 띄우고, alert 확인 시 View를 dismiss하도록 합니다.
추가적으로 cell = tableView.dequeueReusableCell(withIdentifier: “ScanTableViewCell”, for: indexPath) as? ScanTableViewCell에서 ScanTableViewCell이라는 커스텀 셀을 설정하기 위해서 설정해주어야 할 것들이 있습니다. 먼저 다시 스토리 보드로 돌아가 TableView의 TableCell 내에 Label를 추가합니다. 그 다음 TableCell의 identifier를 ScanTableViewCell로 설정합니다.
SerialViewController.swift
import UIKit

class ScanTableViewCell: UITableViewCell {

    // Peripheral의 이름을 표시할 Label입니다. ScanViewController뷰의 셀 내의 Label과 연결합니다.
    @IBOutlet weak var peripheralName: UILabel!

    override func awakeFromNib() {
        super.awakeFromNib()
    }

    /// peripheral의 이름을 파라미터로 입력받아 Cell을 update합니다.
    func updatePeriphralsName(name : String?)
    {
        guard name != nil else { return }
        peripheralName.text = name
    }
}
ScanTableViewCell 클래스를 선언하고 아까 추가했던 Label을 peripheralName에 연결합니다. tableView(_ tableView: UITableView, cellForRowAt indexPath: IndexPath)부분에서 Cell을 표현할 때 Peripheral의 이름을 파라미터로 하여 updatePeripheralName()을 호출하면 Cell의 Label이 peripheral의 이름으로 변경됩니다.
BluetoothSerial.swift
	 /// 기기 검색을 시작합니다. 연결이 가능한 모든 주변기기를 serviceUUID를 통해 찾아냅니다.
    func startScan() {
        guard centralManager.state == .poweredOn else { return }

      // CBCentralManager의 메서드인 scanForPeripherals를 호출하여 연결가능한 기기들을 검색합니다. 이 떄 withService 파라미터에 nil을 입력하면 모든 종류의 기기가 검색되고, 지금과 같이 serviceUUID를 입력하면 특정 serviceUUID를 가진 기기만을 검색합니다.
    	centralManager.scanForPeripherals(withServices: [serviceUUID], options: nil)

    	let peripherals = centralManager.retrieveConnectedPeripherals(withServices: [serviceUUID])
    	for peripheral in peripherals {
         // TODO : 검색된 기기들에 대한 처리를 코드로 작성합니다.
         delegate?.serialDidDiscoverPeripheral(peripheral: peripheral, RSSI: nil)
    	}
		}

	// 기기가 검색될 때마다 호출되는 메서드입니다.
    func centralManager(_ central: CBCentralManager, didDiscover peripheral: CBPeripheral, advertisementData: [String : Any], rssi RSSI: NSNumber) {
        // RSSI는 기기의 신호 강도를 의미합니다.
        // TODO : 기기가 검색될 때마다 필요한 코드를 여기에 작성합니다.
     	  delegate?.serialDidDiscoverPeripheral(peripheral: peripheral, RSSI: RSSI)
    }

  // characteristic 검색에 성공 시 호출되는 메서드입니다.
    func peripheral(_ peripheral: CBPeripheral, didDiscoverCharacteristicsFor service: CBService, error: Error?) {
        for characteristic in service.characteristics! {
            // 검색된 모든 characteristic에 대해 characteristicUUID를 한번 더 체크하고, 일치한다면 peripheral을 구독하고 통신을 위한 설정을 완료합니다.
            if characteristic.uuid == characteristicUUID {
                // 해당 기기의 데이터를 구독합니다.
                peripheral.setNotifyValue(true, for: characteristic)
                // 데이터를 보내기 위한 characteristic을 저장합니다.
                writeCharacteristic = characteristic
                // 데이터를 보내는 타입을 설정합니다. 이는 주변기기가 어떤 type으로 설정되어 있는지에 따라 변경됩니다.
                writeType = characteristic.properties.contains(.write) ? .withResponse :  .withoutResponse
                // TODO : 주변 기기와 연결 완료 시 동작하는 코드를 여기에 작성합니다.
              	delegate?.serialDidConnectPeripheral(peripheral: peripheral)
            }
        }
    }
다시 BluetoothSerial.swift로 돌아가서 TODO로 남겨놨던 부분을 채워주었습니다. startScan()과 centralManager(_ central: , didDiscover peripheral: , advertisementData: , rssi RSSI: )에서는 ScanViewController의 serialDidDiscoverPeripheral를 호출하도록 설정하였습니다. 여기서는 peripheral을 파라미터로 전달하여 ScanViewController의 peripheralList에 저장되도록 하고, TableView에 나타나도록 합니다. peripheral(_ peripheral: CBPeripheral, didDiscoverCharacteristicsFor service: CBService, error: Error?)에서 연결이 완료되면 serialDidConnectPeripheral()를 호출하여 alert를 띄우고 ScanViewController 뷰를 dismiss 시키도록 합니다.
블루투스 기기 검색을 위해 필요한 소스는 모두 작성했습니다. 이제 테스트를 해봅시다!
결과
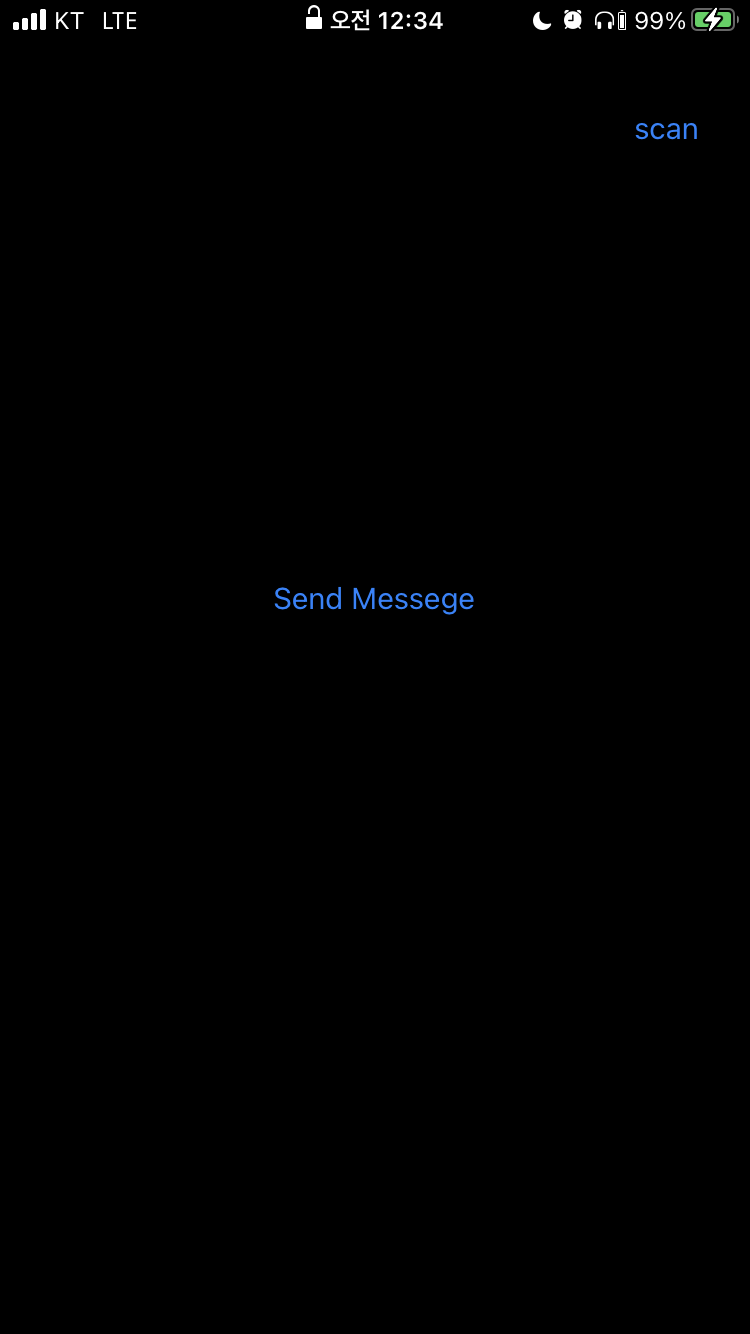
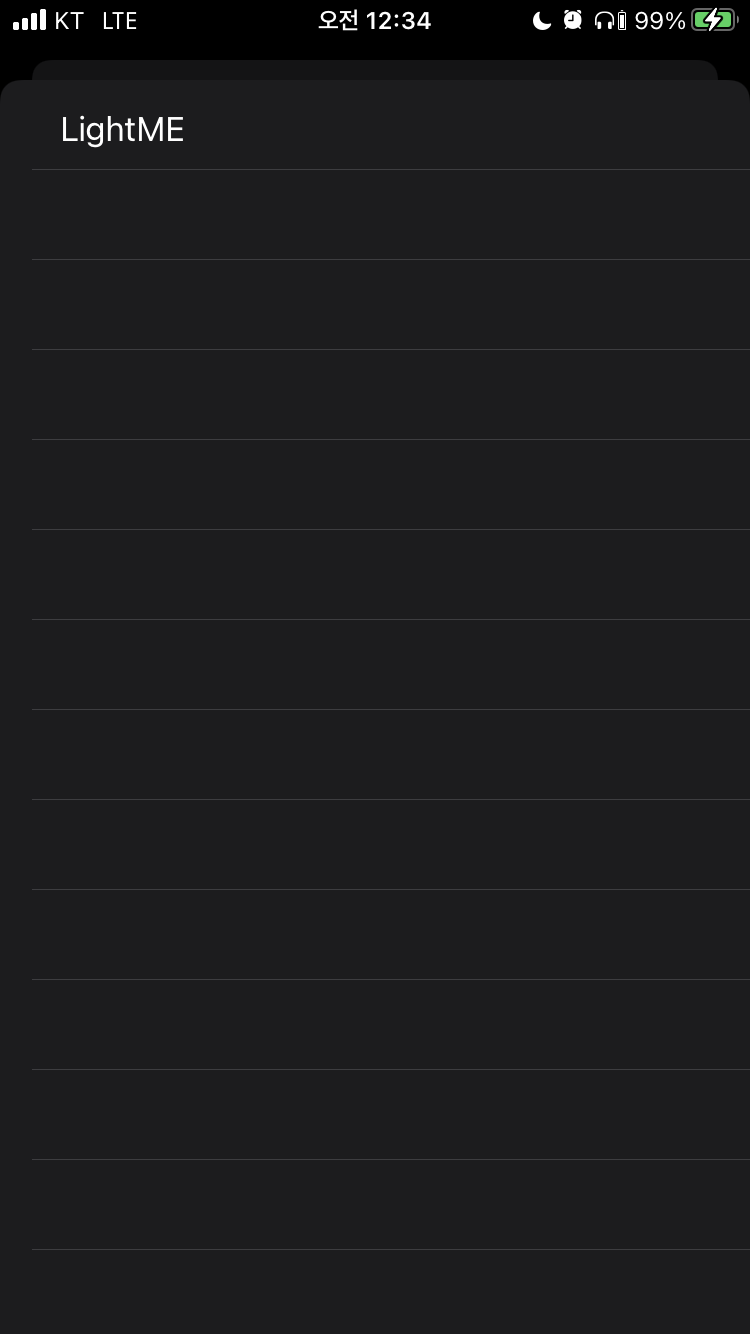
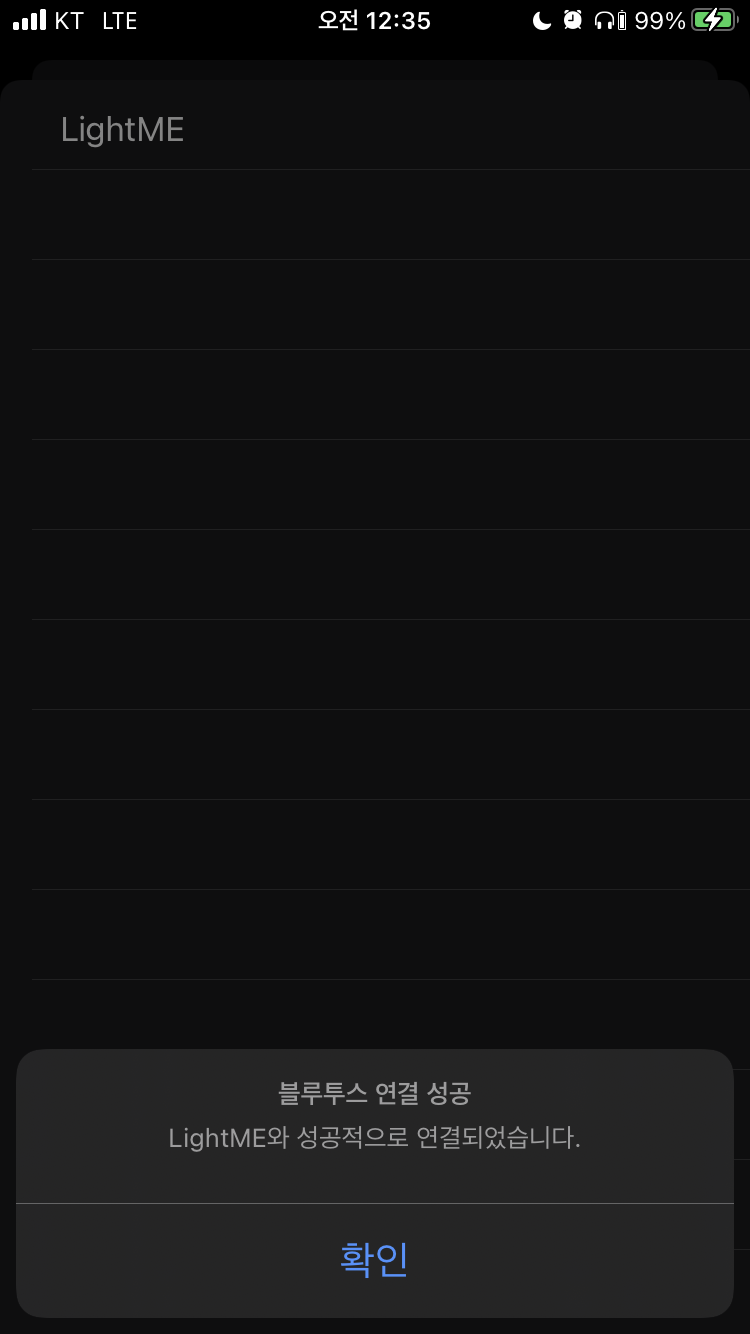
Serial View Controller의 scan 버튼을 클릭하면 Modal View로 Scan View Controller가 나타납니다. Light Me라는 주변기기가 List에 검색되었고, 이 기기에 대한 연결을 요청하여 연결되면 alert가 나타나게됩니다.
마무리
이번 포스팅은 아쉬운 점이 많은 거 같습니다. 조금 더 자세히 설명드리고 싶었는데 내용이 너무 많아질 듯하여 생략된 부분이 많네요. 여러 개의 클래스를 다루다보니 더 복잡하게 느끼실 수도 있는 부분이 있을 거 같습니다. 설명을 조금 더 일목요연하게 하고 싶었는데 부족한 점이 많네요…
다음 포스팅에서는 연결된 기기와의 데이터 통신 부분을 설명드릴 예정입니다. 그래도 다음 포스팅은 내용이 더 간단하여 더 쉽게 작성할 수 있을거 같아요. 그럼 부디 도움이 되셨길 바라며 저는 이만 물러가겠습니다. 감사합니다!
소스코드 : https://github.com/staktree/iOSBluetoothSample